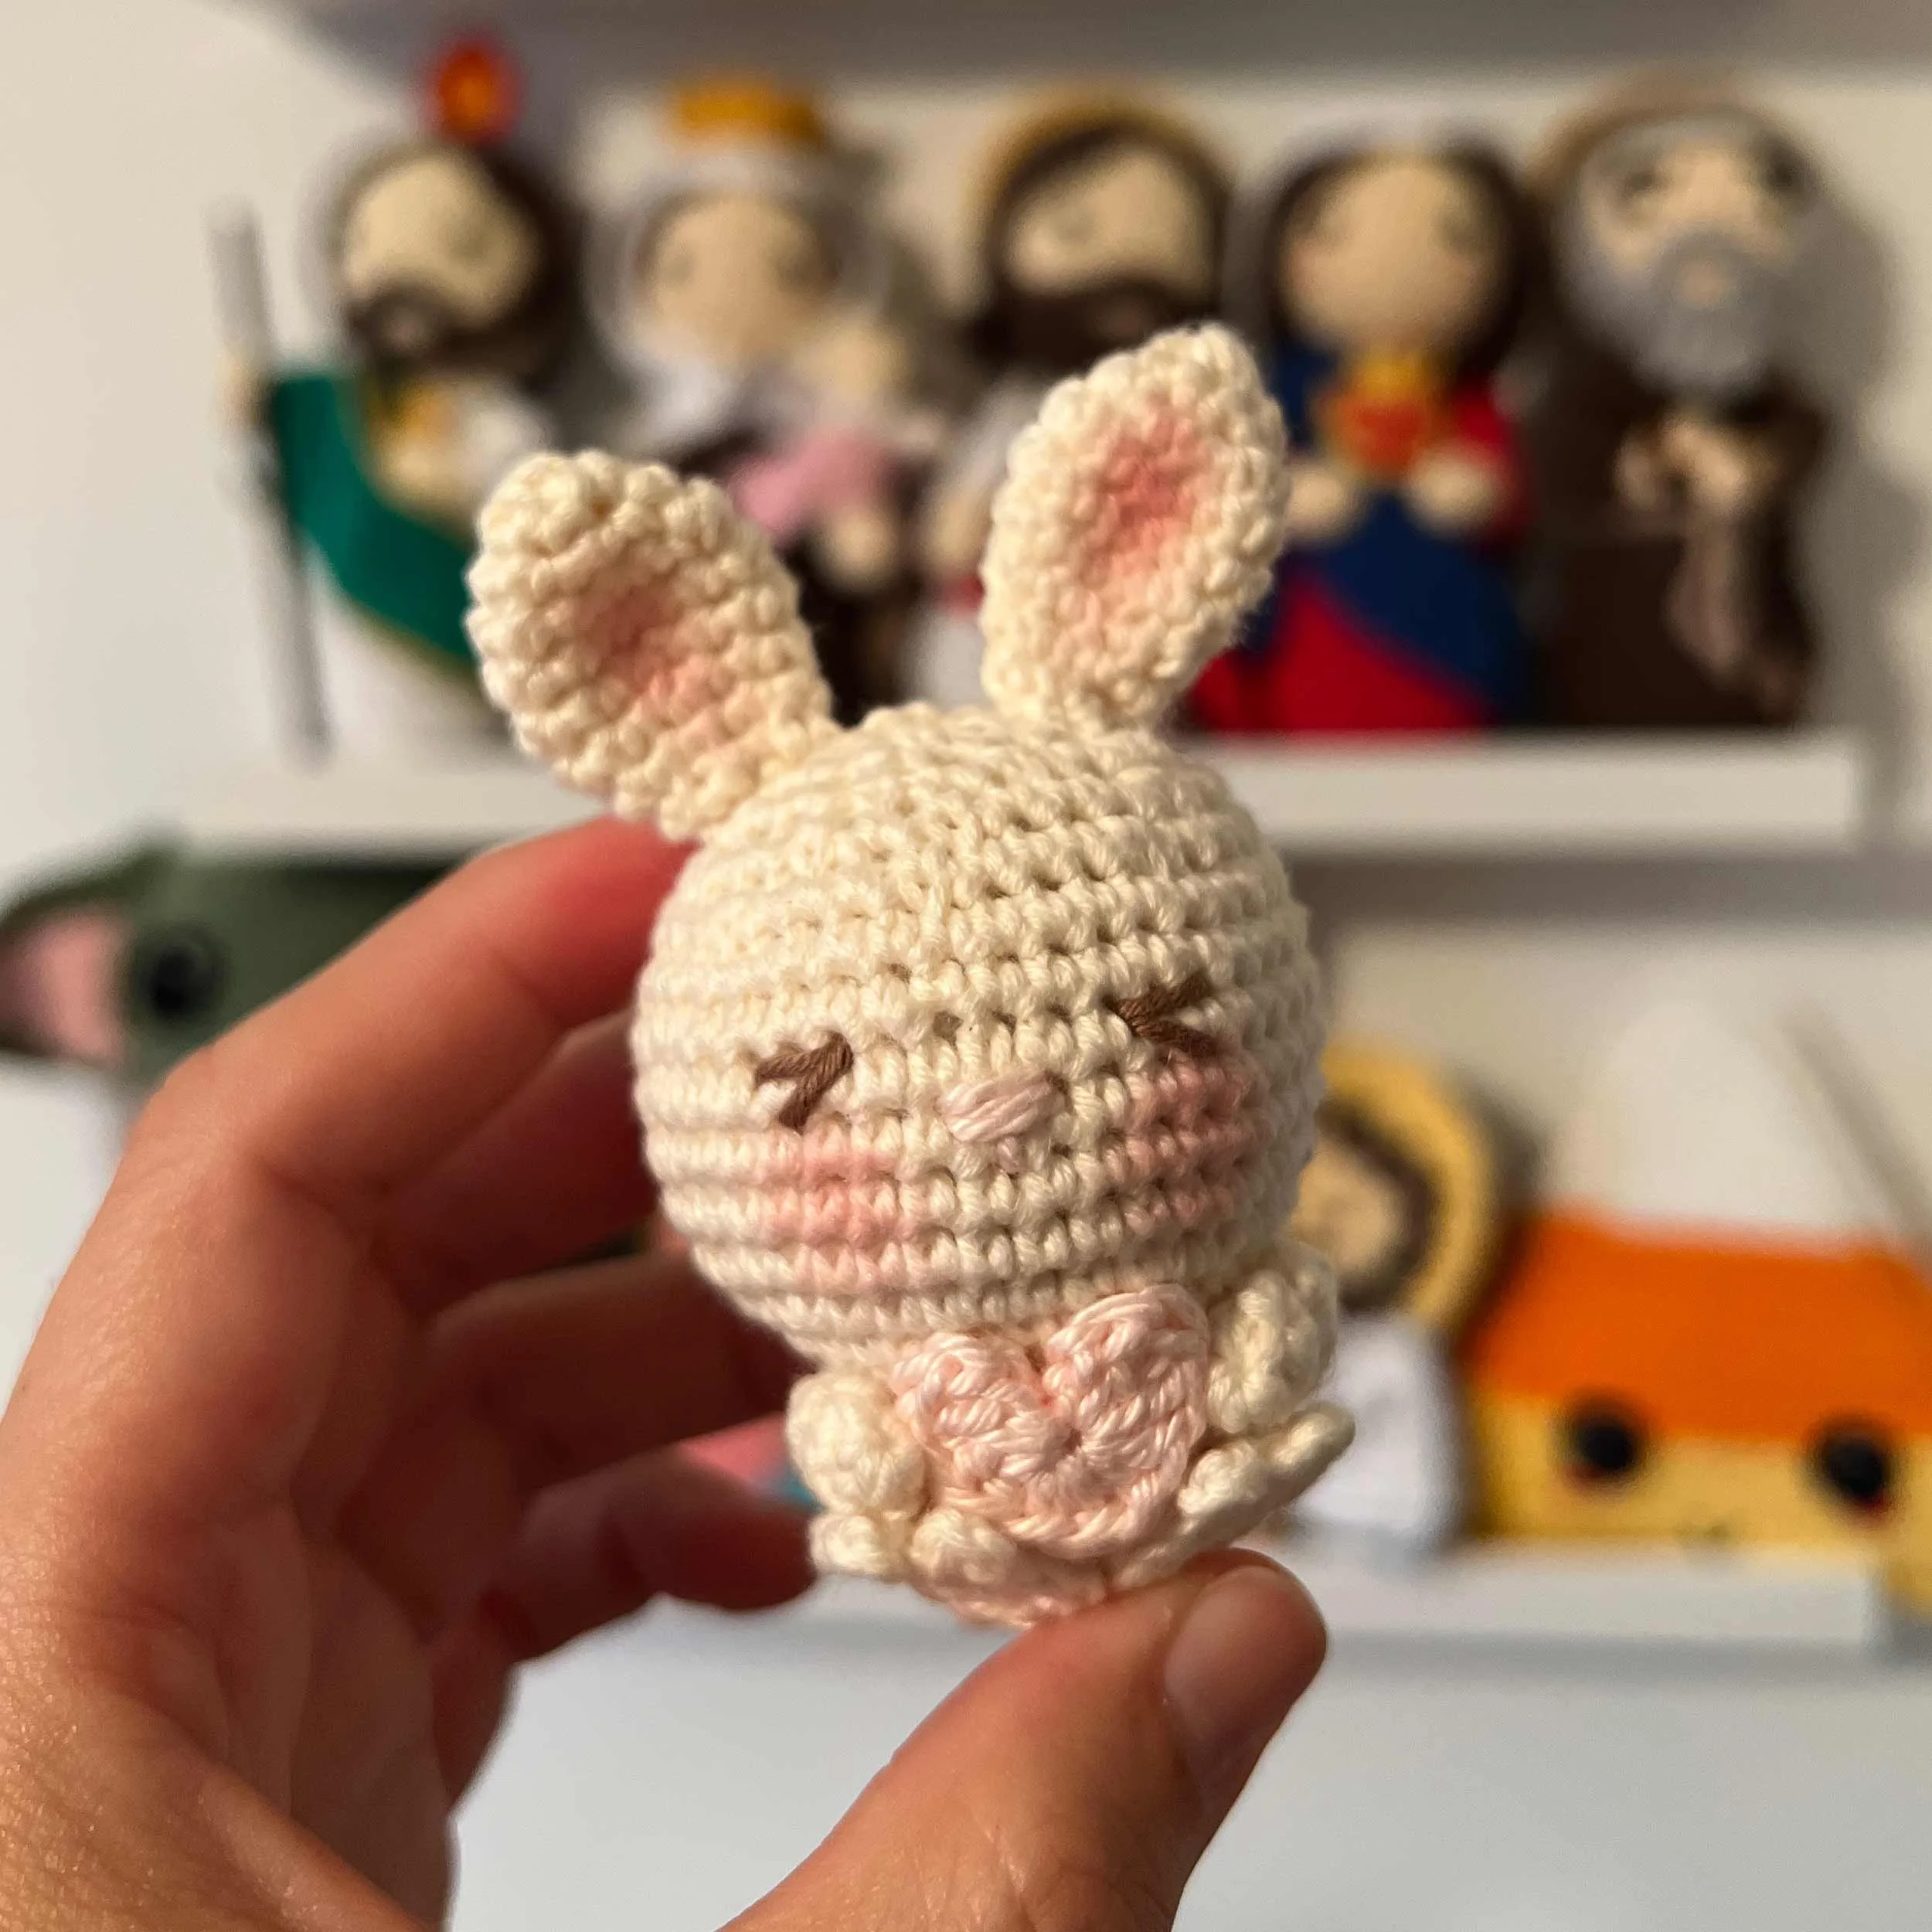
Valentine's Day Bunny with Heart · Free Crochet Pattern
Hi there! I'm back to sharing patterns with you, and today I bring you this super cute bunny that makes a lovely little gift for your loved ones, best friends, family, or anyone you want to surprise with a sweet handmade detail. I made mine for my baby! 💕

For this project, I used lightweight cotton yarn so the bunny turns out pocket-sized—perfect for a keychain too!
Materials
Lightweight mercerized cotton yarn in the colors of your choice (I used beige for the bunny and pink for the heart, plus a bit of brown to embroider the eyes)
3.00 mm crochet hook
Yarn needle
Hot glue
Scissors
Blush powder to add color to the ears and cheeks
Instructions
In this pattern, I will use the following abbreviations:
sc – single crochet
sl st – slip stitch
hdc – half double crochet
inc – increase: make two stitches in the same stitch
dec – decrease: crochet two stitches together
At the end of each row or round, you’ll see a number in parentheses. This indicates how many stitches you should have when you finish that row or round. For example, if it says (12), that means you should count 12 stitches at the end of that section.

Let’s start crocheting!
Valentine’s Bunny with Heart
Body/Head
We will work in continuous rounds.
Magic ring, 6 sc (6)
6 inc (12)
1 sc + 1 inc x 6 (18)
4–8. 18 sc (18)2 sc + 1 inc x 6 (24)
2 sc + 1 inc x 8 (32)
3 sc + 1 inc x 8 (40)
12–17. 40 sc (40)3 sc + 1 dec x 8 (32)
2 sc + 1 dec x 8 (24)
2 sc + 1 dec x 6 (18)
1 sc + 1 dec x 6 (12)
6 dec (6)
Arms (x2)
We will work in continuous rounds.
Magic ring, 5 sc (5)
2–4. 5 sc (5), leave a long tail to sew to the body.
Legs (x2)
Ch 4, starting from the 2nd ch from hook: sc, sc, 3 sc in the last ch, continue on the other side: sc, 2 sc in the last stitch, sl st to the first stitch.
Continue with sl st, sl st, ch 2, sl st in the next stitch repeat 2 more times and finish with 3 sl st at the end. You can leave a long tail to sew to the body or, as I did, attach with hot glue.
Ears (x2)
We will work in continuous rounds.
Magic ring, 6 sc (6)
6 sc (6)
6 inc (12)
4–6. 12 sc (12)2 sc + 1 dec x 3 (9)
9 sc (9)
1 sc + 1 dec x 3 (6), leave a long tail to sew to the head.
Tail
We will work in continuous rounds.
Magic ring, 6 sc (6)
6 sc (6)
1 sc + 1 dec x 2 (4), leave a long tail to sew to the body.
Heart
Magic ring + ch 1, work the rest of the stitches inside the magic ring:
2 dc, 1 hdc, sc, dc, 1 hdc, 2 dc, ch 2, sl st to the magic ring and cut the yarn.
Pull the initial yarn tail to tighten and form the heart.
Assembly
With all the pieces ready, pin them in place. First, sew on the ears, arms, and tail. Then, glue the heart between the arms and legs. Embroider the eyes, nose, and paint the ears and cheeks with pink blush.
I didn’t take photos of the process, sorry! I get so excited and forget! Hehe, but I left this reel I made on Instagram.
I hope you enjoyed this pattern! If you decide to make it, I’d love to see your creation. Please tag me in your Instagram or Facebook posts by adding:
Pattern by @juliefruuu #juliefruuu
Thank you! If you have any questions, feel free to message me!
And if you liked it, share it!
Hugs and kisses! 💕
The information and photos in this post are the property of Juliefruuu. You may not copy, paste, or reproduce this content in full or in part—digitally, verbally, in writing, or in any other form—including translations.
You are welcome to sell the products you make using these patterns, as long as you give proper credit for the design and pattern to Juliefruuu. Please tag your posts with @juliefruuu and #juliefruuu, and link back to this post.
This post may contain affiliate links, which means Juliefruuu may receive a small commission if you click on them and purchase something we've recommended. Clicking on these links does not cost you anything extra, but it helps keep this page running and full of more free ideas and patterns! Thank you so much!!!

Hey! Gracias por pasar por aquí, soy Julissa, alias Juliefruuu y espero ayudarte a crear tu propio mundo creativo! Te animaste hacer este patrón? Si! Porfa etiquetame @juliefruuu en tus publicaciones y déjame verlo! Entonces… qué proyecto empezamos ahora?? ;D
Que tal estos…


Nos vemos en instagram!


